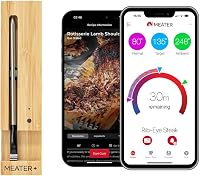
How to Calibrate a MEATER Thermometer
You don't calibrate a MEATER probe at home; it's sealed and lab-calibrated. You check its accuracy in ice water and boiling water, and replace the probe if readings drift more than about 1°F.
On this page (18 sections)
- Does a MEATER thermometer need calibration?
- How do you run the ice water accuracy check?
- How do you check the high end with boiling water?
- What does the MEATER app say about accuracy?
- How do you set up and pair the probe before checking it?
- What causes a MEATER reading to look wrong?
- How do you read the app's cook data without overreacting?
- When should you replace the probe?
- How often should you recheck accuracy?
- Does a MEATER thermometer need calibration?
- How do you run the ice water accuracy check?
- How do you check the high end with boiling water?
- What does the MEATER app say about accuracy?
- How do you set up and pair the probe before checking it?
- What causes a MEATER reading to look wrong?
- How do you read the app's cook data without overreacting?
- When should you replace the probe?
- How often should you recheck accuracy?
You don't calibrate a MEATER thermometer at home. The probe is sealed and lab-calibrated before it ships, so there's no adjustment screw and no reset menu.
What you can do is check its accuracy in ice water and boiling water and replace the probe if the readings are off.
That answer surprises people who are used to dial thermometers. Those have a hex nut you turn to zero the needle.
A MEATER probe has no such nut, so the "how to calibrate MEATER thermometer" job is really an accuracy check you repeat when a cook looks wrong.
Does a MEATER thermometer need calibration?
No, a MEATER thermometer doesn't need routine calibration. The probe is calibrated at the factory, and the MEATER Pro even arrives with a calibration certificate in the box.
You're checking accuracy, not adjusting the sensor.
The difference matters because the probe sits inside your food. Heat, moisture, and repeated washings can eventually affect any sensor, so a check tells you whether the reading still holds.
If it does, you keep cooking. If it doesn't, you stop trusting that probe.
Calibration on a dial thermometer fixes the display. A sealed digital probe has nothing to fix from the outside, so the only practical step is verification followed by replacement.
Plan on a check now and then rather than a scheduled calibration.
How do you run the ice water accuracy check?
The ice water test is the simplest check. Fill a glass with crushed ice, add a little cold water, stir, and hold the probe tip in the center for about 30 seconds.
A correct MEATER should read close to 32°F (0°C).
Water and ice together hold that temperature steadily, which makes the test more reliable than a glass of tap water. Keep the tip away from the glass sides and bottom, where the glass itself can pull the reading up or down.
Read the number in the MEATER app rather than guessing from the display. The app shows the internal temperature the probe is reporting.
A reading within about 1°F of 32°F means the low end of the range is sound.
Repeat the test in the same glass if the first number looks odd. Let the probe return toward room temperature between dips so you're not testing a cold sensor against cold water.
How do you check the high end with boiling water?
The boiling water test covers the other end of the range. Bring water to a rolling boil, then hold the probe tip in the water for about 30 seconds and compare the reading to your altitude's boiling point.
Boiling point drops as you climb. At sea level it's 212°F (100°C), and it falls roughly 1.8°F for every 1,000 ft of elevation.
A probe that reads 208°F in Denver is close; the same number at sea level suggests a problem.
Take the pan off the heat before you dip the probe, and keep the tip clear of the metal base. Stir the water first so the heat is even, then read the app.
A steady number within about 2°F of your local boiling point is normal.
The high end matters for roasts, poultry, and any cook that finishes hot. If the ice test passes but the boiling test doesn't, write down both numbers and send them to MEATER support.
What does the MEATER app say about accuracy?
The app is where the numbers live. Open a cook or the probe's status screen to see the live internal temperature, then compare that number with your ice and boiling checks.
Don't expect a calibration slider in the app. MEATER's probes ship adjusted, and the app is built around guiding the cook, not tuning the sensor.
What the app does give you is the reading and the alerts, so you can spot a probe that's drifted.
For MEATER Pro owners, the maker's stated accuracy is ±0.5°F, checked through a three-point process. That's the target to judge against.
If your readings sit well outside that, the probe isn't behaving as the maker says it should.
The MEATER Plus and MEATER SE report internal temperature up to 212°F and ambient temperature up to 527°F. Both ends of that range are what the two water tests cover.
How do you set up and pair the probe before checking it?
Pair the probe and let it settle before you test it. Charge the probe for at least 2 hours, open the MEATER app, and follow the pairing steps.
A low battery can drop the connection in the middle of a reading.
Our walkthrough of how to pair MEATER Plus covers the app side in detail. For the Plus specifically, the charger's built-in Bluetooth repeater extends the wireless range, so keep the charger near your phone while you test.
If you're new to the probe, how to use MEATER Plus explains the cook setup screens. The same app logic applies across the range, so a reading you see during pairing is the reading to check.
Give the probe a minute to stabilize after pairing. Cold hands and a cold kitchen can slow the first reading, so let the number settle before judging it.
What causes a MEATER reading to look wrong?
Most odd readings come from placement, not from the probe. Push the tip into the thickest part of the meat and keep it away from bone, fat, and the pan.
A tip resting near bone reads the bone's heat, not the meat's.
The ambient sensor has its own limits. Steam, a closed lid, or the tip sitting too close to a hot grate can push the ambient reading around.
That's why a probe that reads fine in ice water can still look strange on the grill.
Charging issues cause a different kind of error. A probe that's low on charge can sleep between readings, and the app then shows a stale number.
A 5-minute charge gives about 2 hours of cook time on the MEATER Plus, so top it up before a long cook.
Finally, remember that the internal and ambient sensors read different things. A wide gap between them during a cook is normal and doesn't mean the probe is faulty.
How do you read the app's cook data without overreacting?
Read the trend, not one number. The app updates the internal temperature as the meat cooks, and the guided cook system shows an estimated finish time.
A single reading that looks high or low matters less than the direction it's moving.
The estimated finish time is based on the current trend. If the meat is stalling or cooking faster than expected, the app adjusts the estimate.
That's normal behavior for a probe reading the meat's center.
Use the rest time alert as part of the plan. Pulling the meat at the app's target and letting it rest means the final temperature lands where you want it.
A probe that reads a degree or two off won't ruin a roast.
If you suspect the probe, run both water tests again before the next cook. A quick check takes minutes and saves an overcooked meal.
When should you replace the probe?
Replace the probe when the numbers fail both checks. If the ice water and boiling water tests both read more than about 1°F to 2°F off, the sensor has drifted.
At that point a replacement is the practical fix.
The MEATER SE carries the same high-quality probe and specs as the MEATER Plus at a lower price. It's the budget route if you need a fresh probe and already own a charger.
For heavy grilling and high-heat searing, the MEATER Pro raises the ambient limit to 1000°F and adds five internal sensors. That makes it the better fit if your cooks often run hot.
The range of your setup matters too. Wireless meat thermometer range explains why a dropped connection can look like a bad reading.
For a full setup walkthrough on a different brand, see how to use a wireless meat thermometer.
How often should you recheck accuracy?
Check the probe once when it's new and again if a cook goes wrong. A twice-a-year ice water test is plenty for most home cooks.
That cadence catches drift without turning every cook into a science project.
Clean the probe before each check and let it dry. Water left on the tip can skew the first reading.
For the MEATER Plus, the probe is dishwasher safe, so cleanup is simple.
Store the probe in its charger between uses so it stays charged. A probe that's always ready is easier to test on a whim.
Keep the charger dry and away from direct heat.
If a reading ever looks off during a real cook, finish the meal with your backup method. Then run the water tests before the next one.
For anyone searching how to calibrate a MEATER thermometer, that's the honest answer: verify with ice and boiling water, trust the lab calibration, and replace a probe that drifts.
Does a MEATER thermometer need calibration?
No, a MEATER thermometer doesn't need routine calibration. The probe is calibrated at the factory, and the MEATER Pro even arrives with a calibration certificate in the box.
You're checking accuracy, not adjusting the sensor.
The difference matters because the probe sits inside your food. Heat, moisture, and repeated washings can eventually affect any sensor, so a check tells you whether the reading still holds.
If it does, you keep cooking. If it doesn't, you stop trusting that probe.
Calibration on a dial thermometer fixes the display. A sealed digital probe has nothing to fix from the outside, so the only practical step is verification followed by replacement.
Plan on a check now and then rather than a scheduled calibration.
How do you run the ice water accuracy check?
The ice water test is the simplest check. Fill a glass with crushed ice, add a little cold water, stir, and hold the probe tip in the center for about 30 seconds.
A correct MEATER should read close to 32°F (0°C).
Water and ice together hold that temperature steadily, which makes the test more reliable than a glass of tap water. Keep the tip away from the glass sides and bottom, where the glass itself can pull the reading up or down.
Read the number in the MEATER app rather than guessing from the display. The app shows the internal temperature the probe is reporting.
A reading within about 1°F of 32°F means the low end of the range is sound.
Repeat the test in the same glass if the first number looks odd. Let the probe return toward room temperature between dips so you're not testing a cold sensor against cold water.
How do you check the high end with boiling water?
The boiling water test covers the other end of the range. Bring water to a rolling boil, then hold the probe tip in the water for about 30 seconds and compare the reading to your altitude's boiling point.
Boiling point drops as you climb. At sea level it's 212°F (100°C), and it falls roughly 1.8°F for every 1,000 ft of elevation.
A probe that reads 208°F in Denver is close; the same number at sea level suggests a problem.
Take the pan off the heat before you dip the probe, and keep the tip clear of the metal base. Stir the water first so the heat is even, then read the app.
A steady number within about 2°F of your local boiling point is normal.
The high end matters for roasts, poultry, and any cook that finishes hot. If the ice test passes but the boiling test doesn't, write down both numbers and send them to MEATER support.
What does the MEATER app say about accuracy?
The app is where the numbers live. Open a cook or the probe's status screen to see the live internal temperature, then compare that number with your ice and boiling checks.
Don't expect a calibration slider in the app. MEATER's probes ship adjusted, and the app is built around guiding the cook, not tuning the sensor.
What the app does give you is the reading and the alerts, so you can spot a probe that's drifted.
For MEATER Pro owners, the maker's stated accuracy is ±0.5°F, checked through a three-point process. That's the target to judge against.
If your readings sit well outside that, the probe isn't behaving as the maker says it should.
The MEATER Plus and MEATER SE report internal temperature up to 212°F and ambient temperature up to 527°F. Both ends of that range are what the two water tests cover.
How do you set up and pair the probe before checking it?
Pair the probe and let it settle before you test it. Charge the probe for at least 2 hours, open the MEATER app, and follow the pairing steps.
A low battery can drop the connection in the middle of a reading.
Our walkthrough of how to pair MEATER Plus covers the app side in detail. For the Plus specifically, the charger's built-in Bluetooth repeater extends the wireless range, so keep the charger near your phone while you test.
If you're new to the probe, how to use MEATER Plus explains the cook setup screens. The same app logic applies across the range, so a reading you see during pairing is the reading to check.
Give the probe a minute to stabilize after pairing. Cold hands and a cold kitchen can slow the first reading, so let the number settle before judging it.
What causes a MEATER reading to look wrong?
Most odd readings come from placement, not from the probe. Push the tip into the thickest part of the meat and keep it away from bone, fat, and the pan.
A tip resting near bone reads the bone's heat, not the meat's.
The ambient sensor has its own limits. Steam, a closed lid, or the tip sitting too close to a hot grate can push the ambient reading around.
That's why a probe that reads fine in ice water can still look strange on the grill.
Charging issues cause a different kind of error. A probe that's low on charge can sleep between readings, and the app then shows a stale number.
A 5-minute charge gives about 2 hours of cook time on the MEATER Plus, so top it up before a long cook.
Finally, remember that the internal and ambient sensors read different things. A wide gap between them during a cook is normal and doesn't mean the probe is faulty.
How do you read the app's cook data without overreacting?
Read the trend, not one number. The app updates the internal temperature as the meat cooks, and the guided cook system shows an estimated finish time.
A single reading that looks high or low matters less than the direction it's moving.
The estimated finish time is based on the current trend. If the meat is stalling or cooking faster than expected, the app adjusts the estimate.
That's normal behavior for a probe reading the meat's center.
Use the rest time alert as part of the plan. Pulling the meat at the app's target and letting it rest means the final temperature lands where you want it.
A probe that reads a degree or two off won't ruin a roast.
If you suspect the probe, run both water tests again before the next cook. A quick check takes minutes and saves an overcooked meal.
When should you replace the probe?
Replace the probe when the numbers fail both checks. If the ice water and boiling water tests both read more than about 1°F to 2°F off, the sensor has drifted.
At that point a replacement is the practical fix.
The MEATER SE carries the same high-quality probe and specs as the MEATER Plus at a lower price. It's the budget route if you need a fresh probe and already own a charger.
For heavy grilling and high-heat searing, the MEATER Pro raises the ambient limit to 1000°F and adds five internal sensors. That makes it the better fit if your cooks often run hot.
The range of your setup matters too. Wireless meat thermometer range explains why a dropped connection can look like a bad reading.
For a full setup walkthrough on a different brand, see how to use a wireless meat thermometer.
How often should you recheck accuracy?
Check the probe once when it's new and again if a cook goes wrong. A twice-a-year ice water test is plenty for most home cooks.
That cadence catches drift without turning every cook into a science project.
Clean the probe before each check and let it dry. Water left on the tip can skew the first reading.
For the MEATER Plus, the probe is dishwasher safe, so cleanup is simple.
Store the probe in its charger between uses so it stays charged. A probe that's always ready is easier to test on a whim.
Keep the charger dry and away from direct heat.
If a reading ever looks off during a real cook, finish the meal with your backup method. Then run the water tests before the next one.
For anyone searching how to calibrate a MEATER thermometer, that's the honest answer: verify with ice and boiling water, trust the lab calibration, and replace a probe that drifts.
Frequently asked questions
Can I recalibrate a MEATER thermometer myself?
No. The probe is sealed and the manufacturer doesn't publish a home calibration routine.
You check accuracy in ice water and boiling water and contact support if a probe reads more than about 1°F off.
What is the ice water test for a meat thermometer?
Fill a glass with crushed ice and a little water, stir, and hold the probe tip in the middle for about 30 seconds. A correct thermometer reads 32°F (0°C); this checks the low end of the range.
Do I need to calibrate a brand-new MEATER probe?
Not usually. New MEATER probes ship already adjusted, and the MEATER Pro arrives with its own calibration certificate.
Run a quick ice water check on the first cook anyway so you know the reading is sound.
How long does a MEATER probe need to charge before a check?
Charge it for at least 2 hours before pairing or testing. The MEATER SE instructions say this avoids pairing drops, and a full charge also keeps the probe from sleeping in the middle of a reading.
Why does my MEATER read differently from my oven thermometer?
The two measure different spots. A MEATER probe reads the meat's internal temperature and the ambient heat near the tip, while an oven dial reads the air around its own sensor, so a gap between them is normal.
When should I replace a MEATER probe instead of checking it again?
Replace it when it fails both the ice water and boiling water checks, or when readings swing wildly between cooks. The maker's support team is the best judge of whether the probe is still under warranty.